Introduction
We would like you to be aware that we now require that the primary use-cases of your applications are to be tested using the Test SDK for 2022R1 certification. This post will provide you with what you need to get your first tests configured and running completely from scratch.
We will go over how to create the test project, generate the screen wrappers, create the extension files to access those wrappers, as well as how to write the tests themselves.
All you need to do now is start writing some real tests!
Creating your First Test Project
First, you will need to download all the required files:
-
- Complete example code files: https://github.com/AaronBeehoo/
- Download and install the version of Acumatica you are testing on https://builds.acumatica.com/
- Download and extract the matching version Test SDK to C:\Acumatica2021R2\TestSDK: http://acumatica-builds.s3.amazonaws.com/index.html?prefix=builds/21.2/21.201.0086/TestSDK/
- Download .NET v4.8: https://dotnet.microsoft.com/en-us/download/dotnet-framework/net48
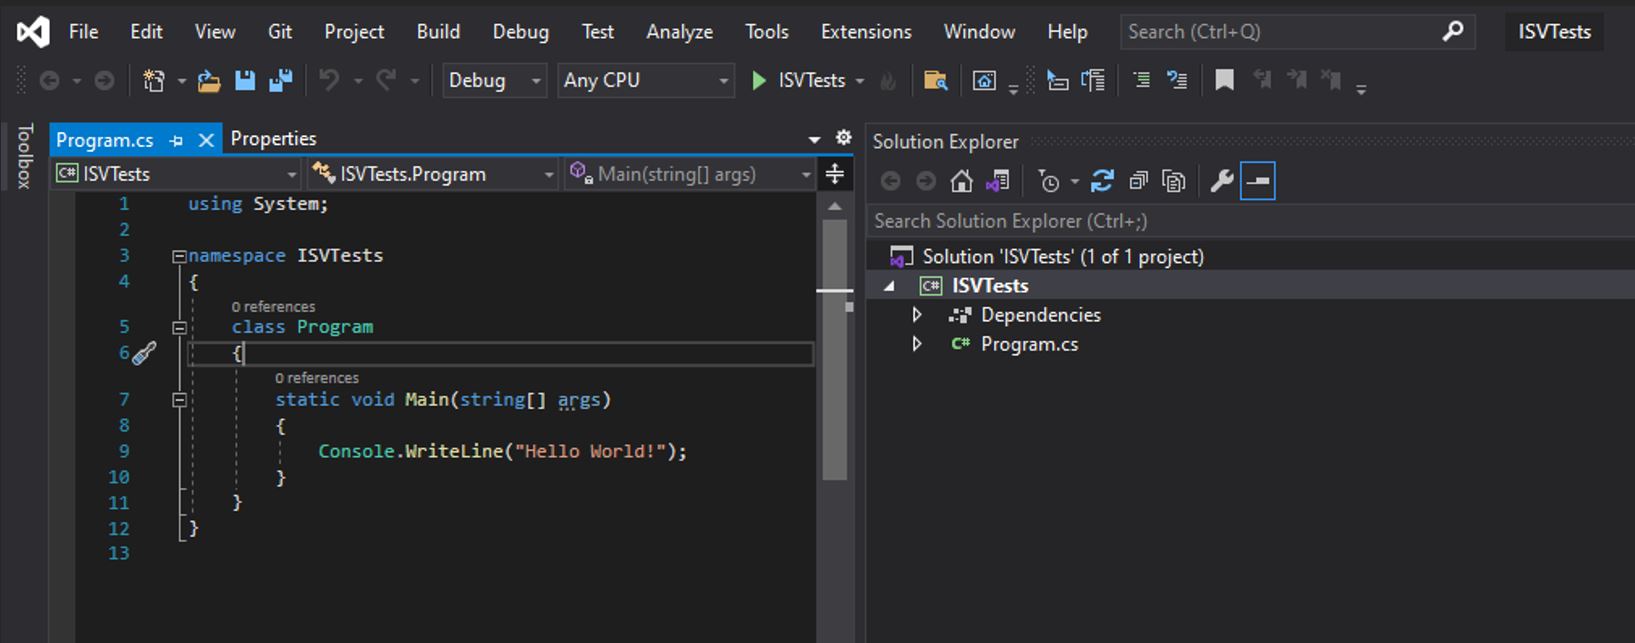
Now you are ready to open Visual Studio and create a new project, using the Console App (.NET Core) C# template:
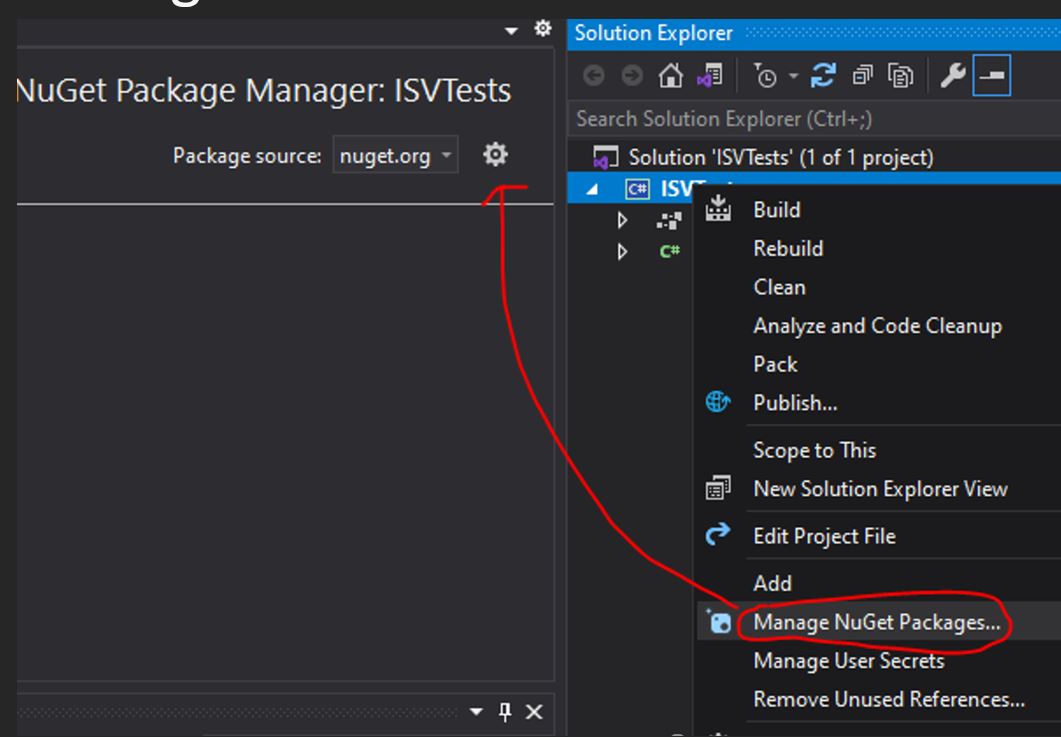
Once the project is created, right-click the project and “Manage Nuget Packages”, Then click the settings icon.
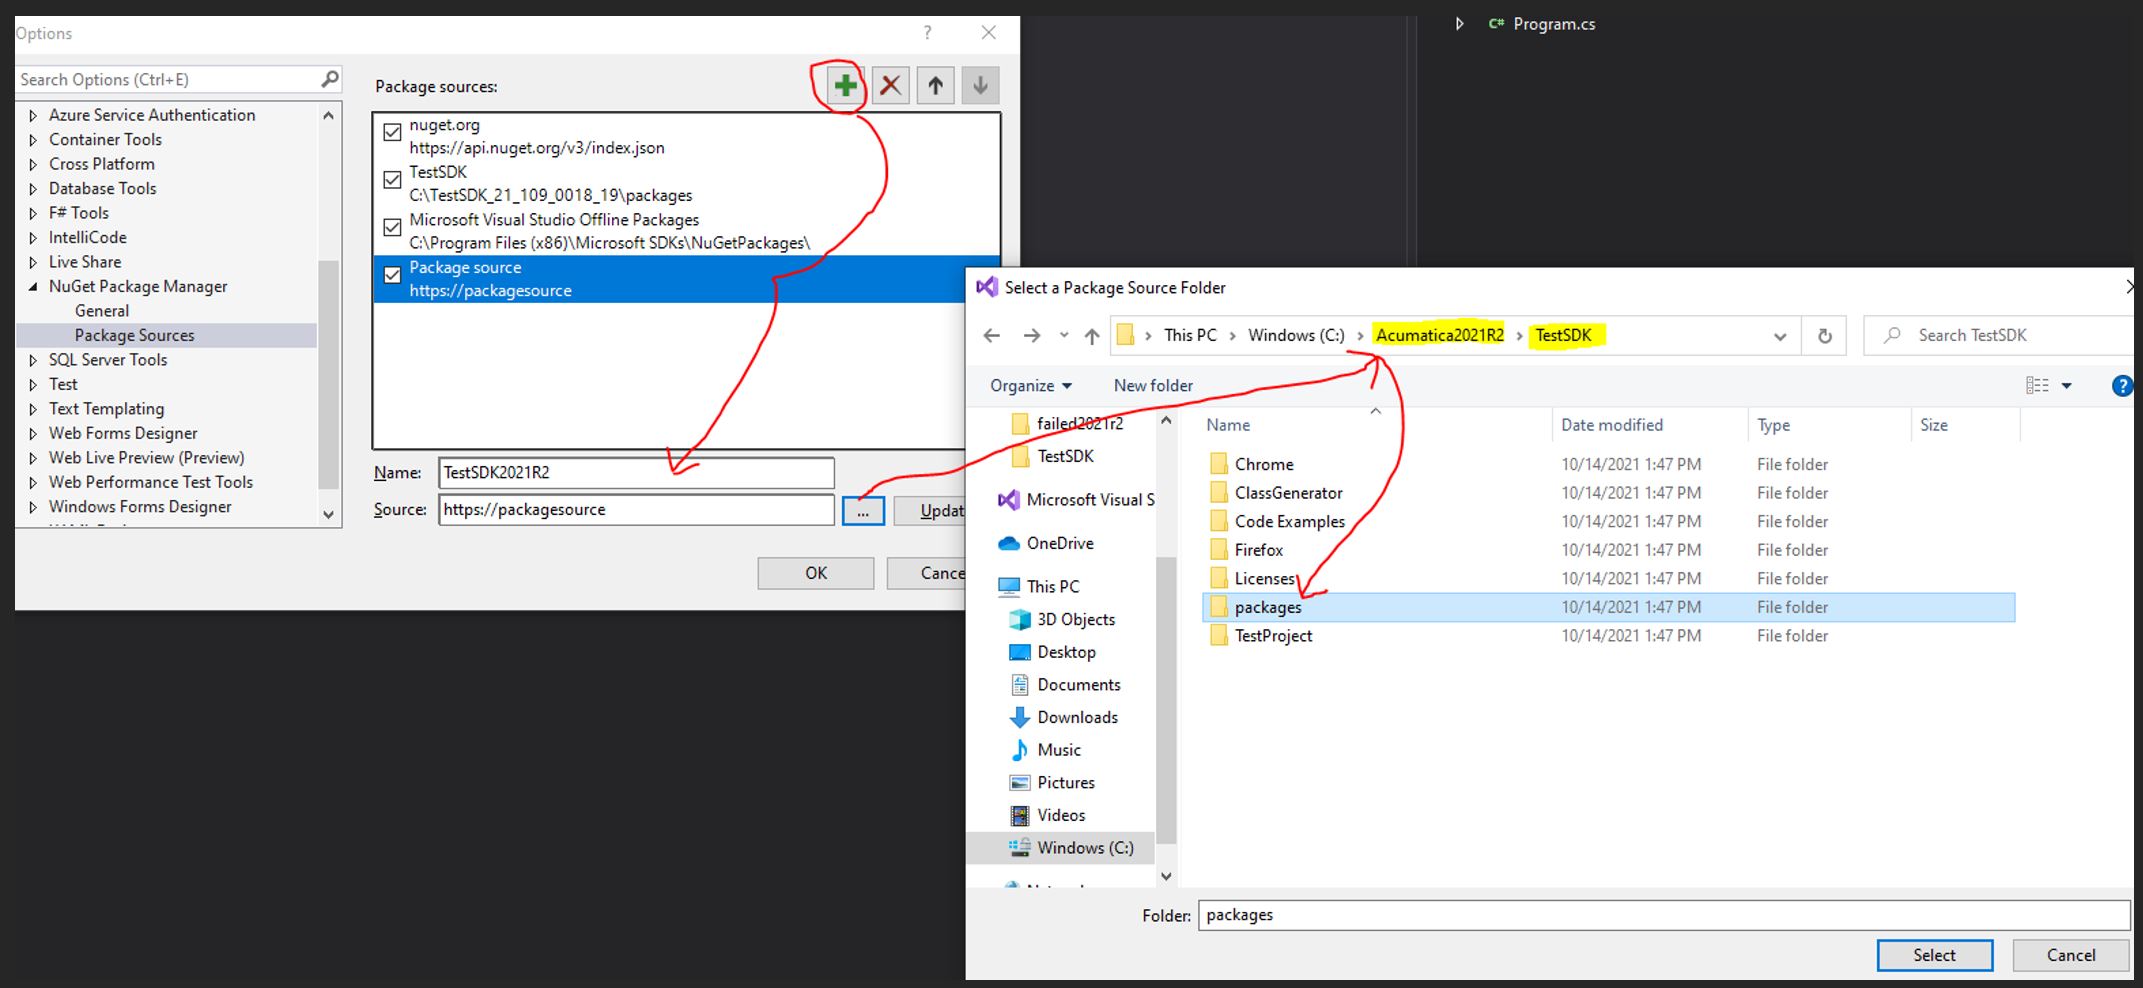
Next, you need to create a new package source. Enter a name and include the Acumatica build number and use the testSDK/packages folder we extracted earlier from C:\Acumatica2021R2\TestSDK.
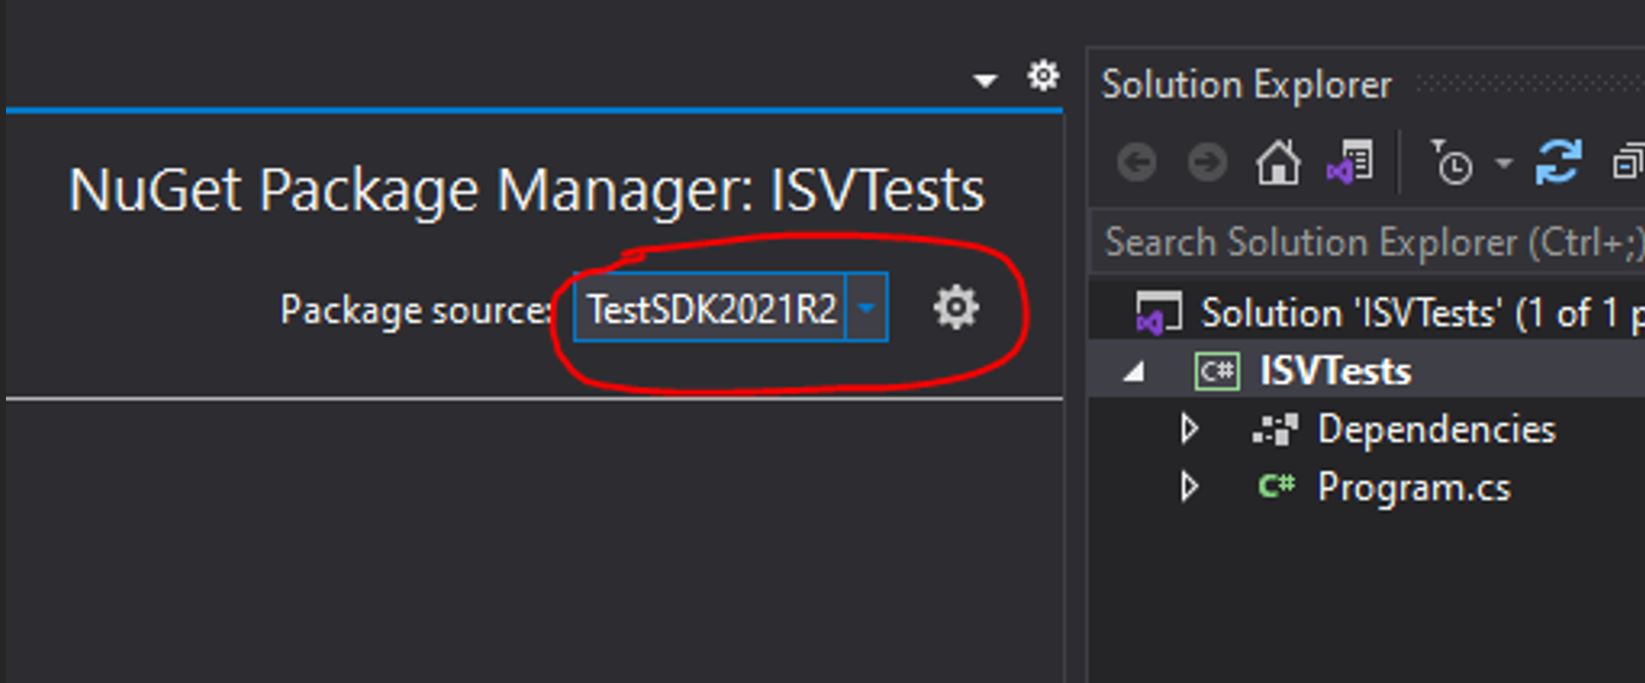
Ensure the newly created package source is selected as shown below.
Install all the references from the added package source.
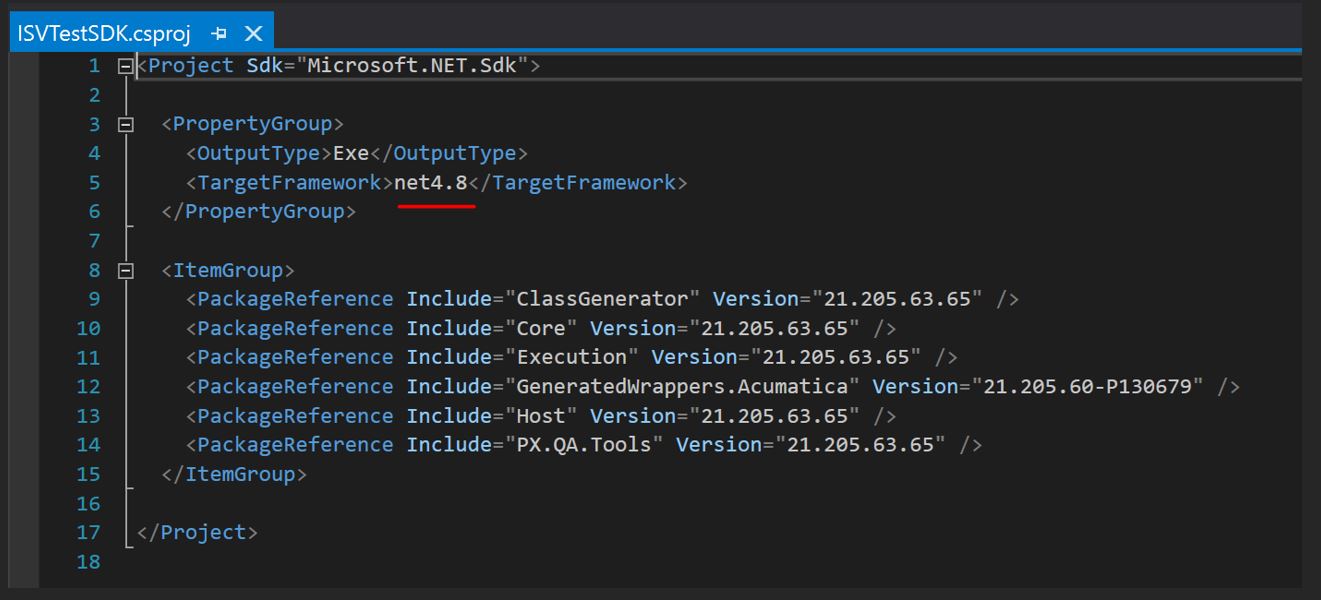
Please note that your .csproj file should look like what we show you below. However, you may need to manually type in net4.8 to target the correct framework.
Generating Screen Wrappers
The next step is to create a new folder named Wrappers in the project and then generate the wrappers needed for your tests using the following instructions. You must Generate the wrappers for every screen you use for your tests, custom screens, and Acumatica screens as well.
Then go to C:\Acumatica2021R2\TestSDK_21_205\ClassGenerator folder and edit the exe.config file and ensure you include all screens you need to use during your test in the FilenameFilter attribute. Also, you will need to fill the other attributes with the correct information from your sites.
Next, do a shift+right click on the ClassGenerator folder and choose Open with PowerShell as shown below.
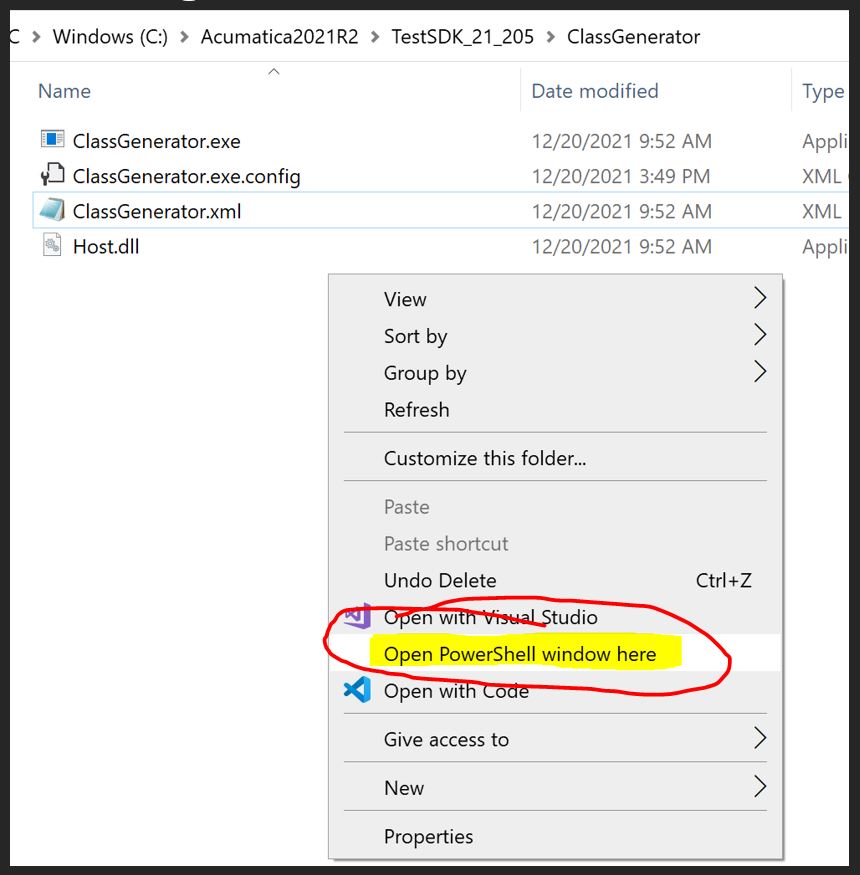
In PowerShell, run the following command to generate the wrappers .\ClassGenerator.exe” The wrappers will be generated into the specified folder you declared in the config file.
Note: The generate wrappers command prompt will take 2-3 mins to show progress, don’t worry, it is not frozen, just keep waiting for the first screen wrapper to generate then they start going quickly.
Then copy those folders with wrappers inside to the Wrappers folder of your solution and congrats, you have the wrappers generated for the default Acumatica and Custom screens!
Now let’s create extensions to make them accessible!
Creating Extensions for Custom screens
We create the Extensions for the Wrappers so they become accessible inside your solution.
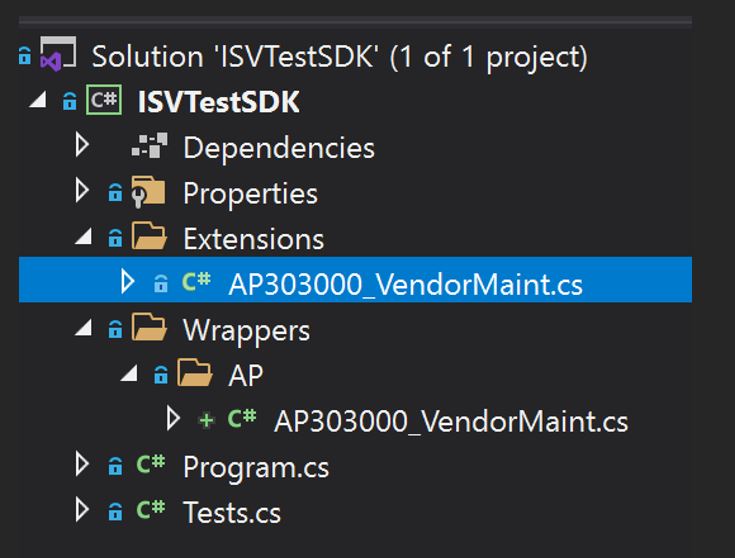
To do this, simply create a folder named Extensions”in the test project then make a cs file for each screen, form, and action used in your code.
You can also see examples without explanation from pages 10-12 of the ReadMe file in the Test SDK download folder.
Now create a .cs file in the extensions folder as follows.
Right-click and inspect the element on the form/button/field that you want to use in your test. Copy the label text of a unique or easily identifiable field you want to access, then take that field name and search the generated wrapper file for the element id or field’s label name.
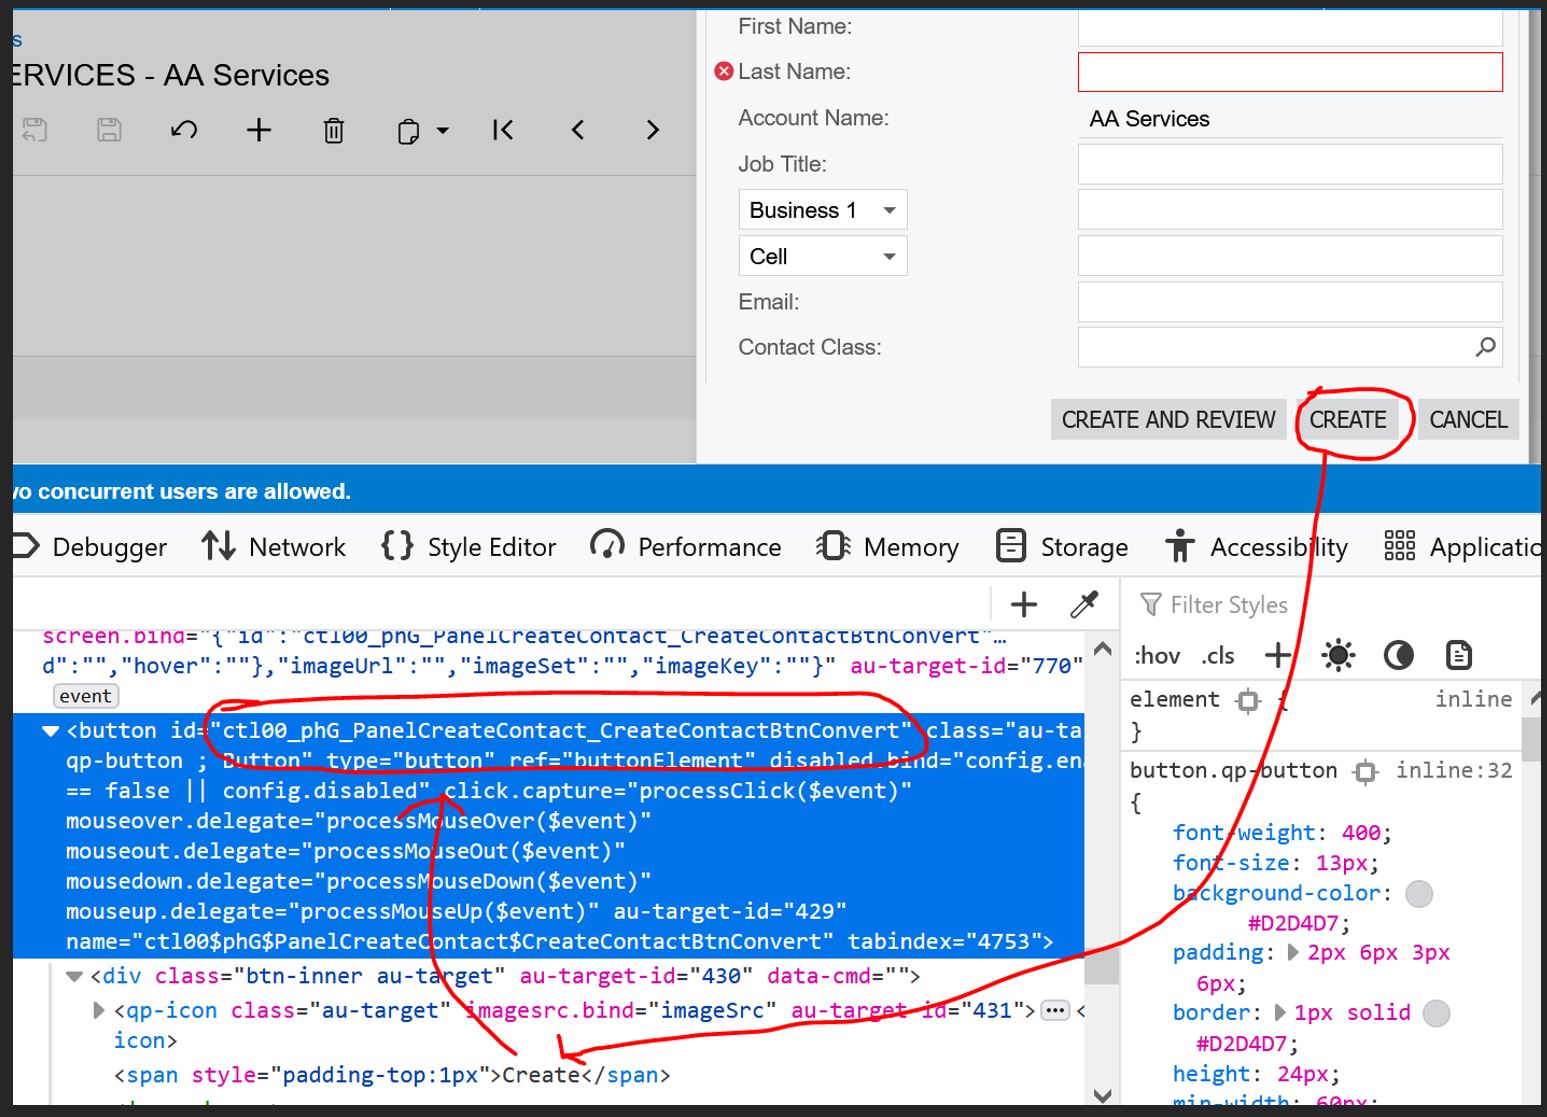
Search the name of the form element in the generated wrapper file.
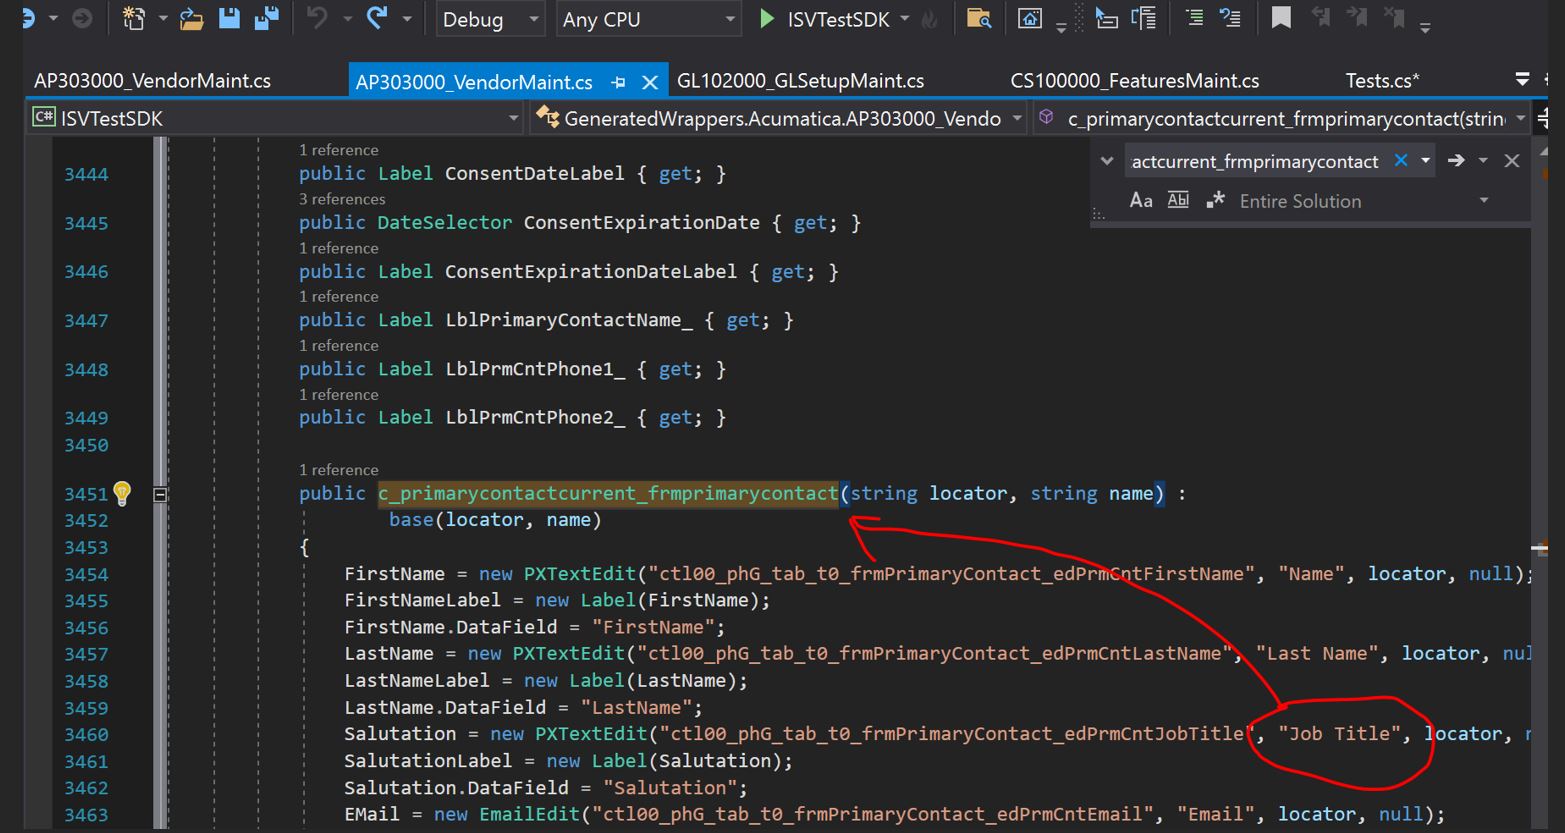
Then search for the first use of the class name. Copy the class and class name from the wrapper.

Paste the two values from the extension file in the format shown below to make it accessible in your test. Name. It is appropriate to use it in your test cases. In this particular case, CreateContactPopupForm.

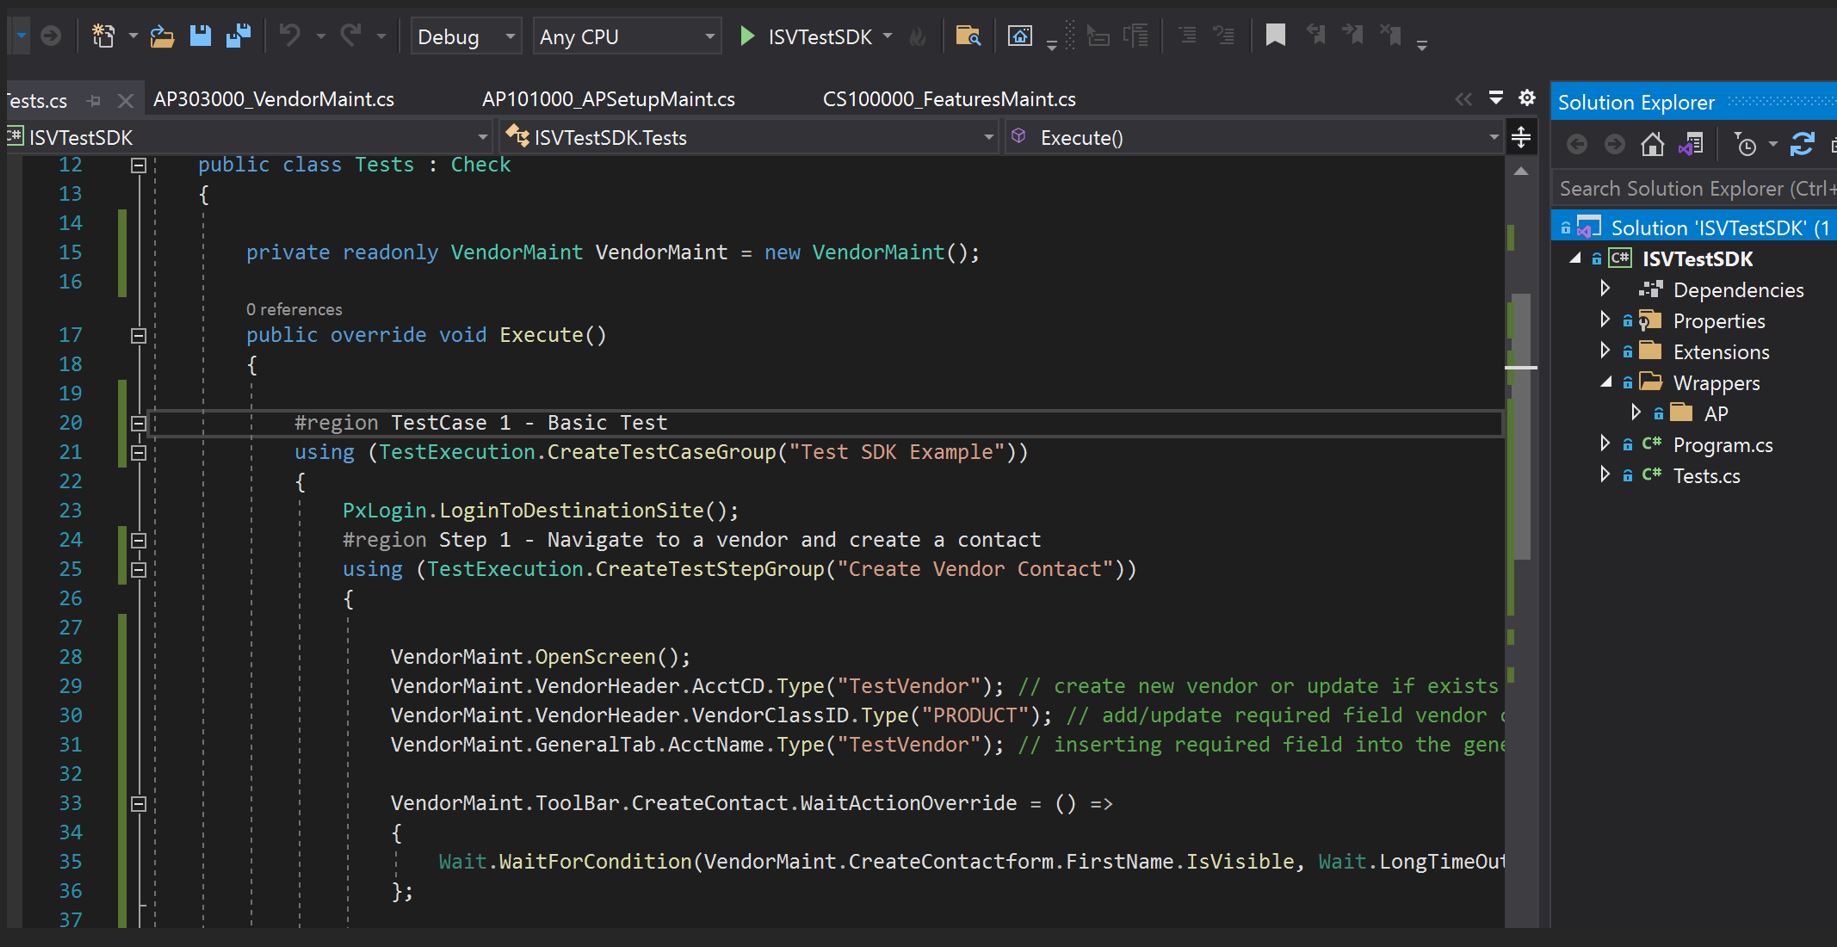
Now you will need to create a basic Test.cs test as seen above. You can make more complex tests following the code snippets on pages 15-19 of the SDKReadme.pdf from the TestSDK download .zip.
Please note that the code example test provided in the readme only works on a blank copy of Acumatica. We always recommend using the SalesDemo data as a base dataset as it has items, accounts, customers, contacts, etc pre-configured.
Next, configure the config.xml from C:\Acumatica2021R2\TestSDK modifying as needed for your site and add the following to the Properties (right-click the solution name -> Properties) of the Test Project so you can simply click run(f5) in visual studio to kick off the test.cs.
.\Tests.exe /config “C:\Acumatica2021R2\TestSDK\config.xml
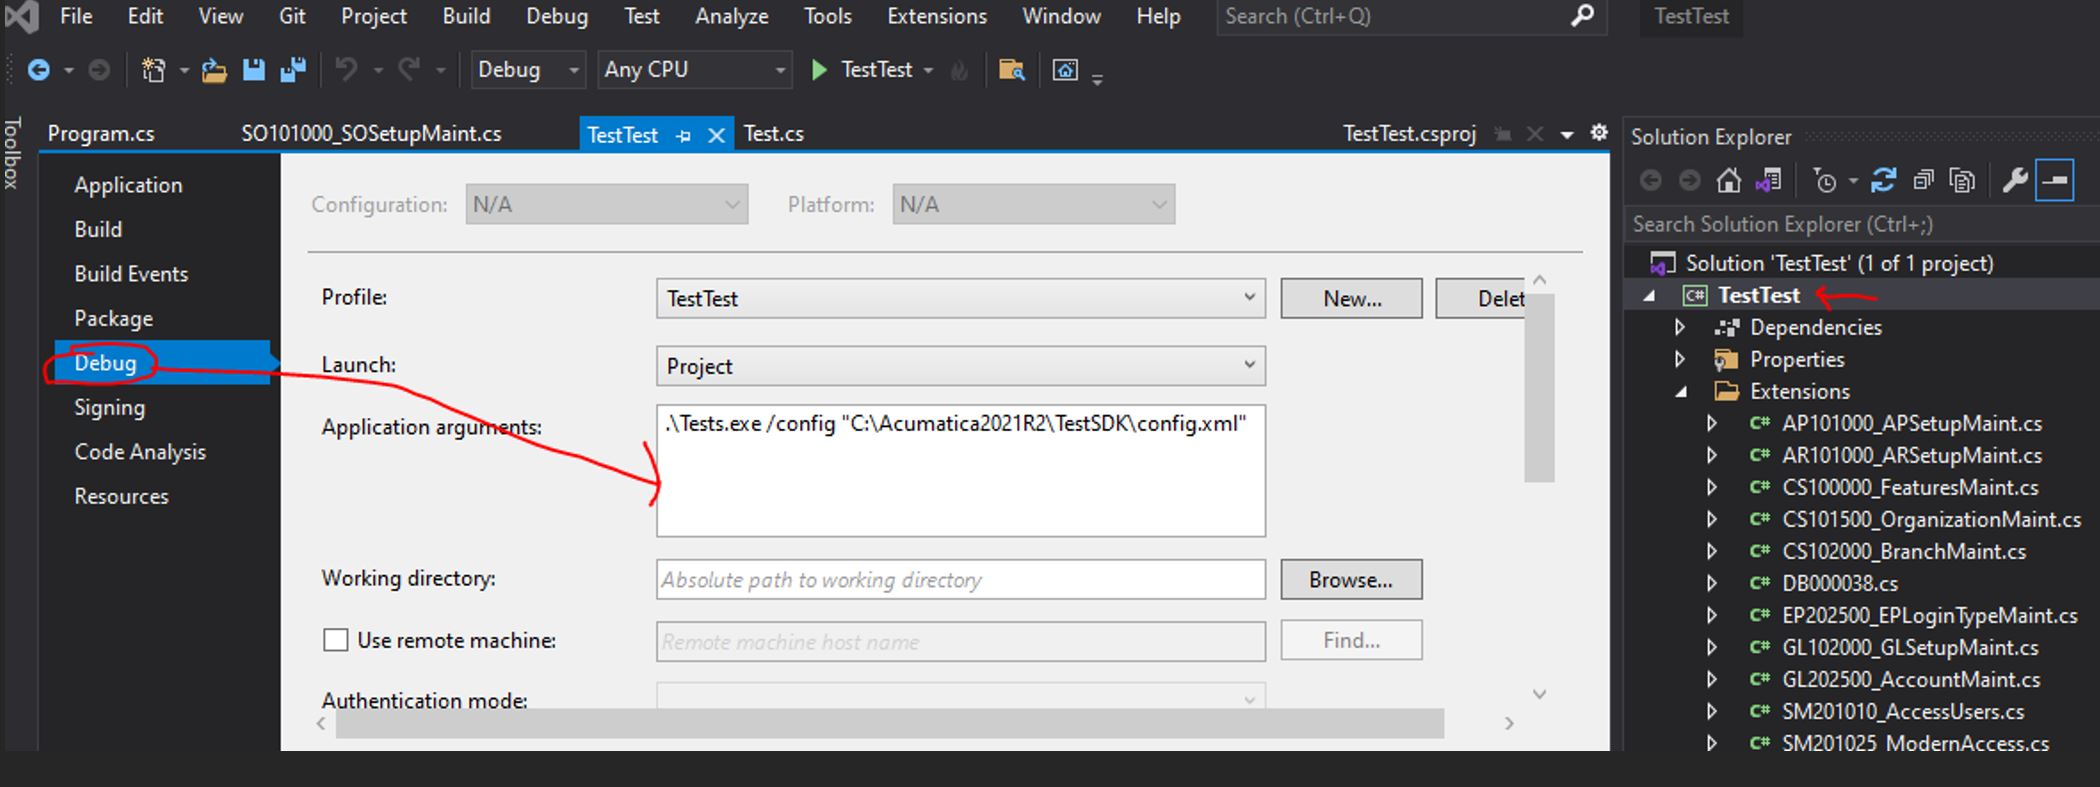
After setting the config.xml and debug application arguments, run the project. The Acumatica site will pop up and run through the steps showing the UI as it runs. Then review the output files in the logging folder location you set in the config files.
Common Errors
- The Acumatica site is no longer accessible after generating wrappers/running test: Something went wrong with the Acumatica site web.config file. Either save it so you can copy the original back into the folder, or just install a new site and regenerate the wrappers.
- Test exited with Error code 0: The test passed successfully.
- Test exited with Error code 1: Invalid/missing file, likely incorrect folder mapped in the config files somewhere, or a missing wrapper/extension
Summary
In this post, we have provided everything you need as developers to set up your initial Test SDK automated test cases to enable a perfect UI-driven simulation of their solution’s use cases. The Test SDK tests will be able to run against each minor and major release of Acumatica to ensure compatibility with each update and if there is a failure, it will let you know exactly where the failure occurred in the logs.
For more detailed information about actual test writing, you can find almost all examples needed in the Test SDK readme.pdf. Additionally, any questions that are not covered inside the Readme, or unexpected errors you encounter, you can submit a Developer Support ticket for further assistance.
Happy Testing!


