Reviewed: Dec, 2023
Today, I want to share with my fellow developers how you can easily send POST requests to Acumatica ERP. To do this, you need to create a new custom project WebHooksConfiguration and Publish it.

After that, you need to create an Extension Library.

In the “WebHooksConfiguration” project you need to create a class that will implement the IWebhookHandler interface. In our case, this is TestWebHooks class. Also, we’ll make a big example of JSON passing objects for testing. So beforehand we’ll add the ObjectJSON class to deserialize the object and method. Also, note that the access modifier for the class must be “Public”. Otherwise, in the screenshot SM304000 (WebHooks) this WebHook will not be available.

The code you see above is contained in the GIST below.
GIST: https://gist.github.com/yuriycto/059395e4abc43d42078d8237093d416b
After you have created a class that implements the “IWebhookHandler” interface.
Build the project
Go to customization -> Files -> Add New Record -> and select the project which contains your IWebhookHandler class. Save and click Publish Current Project.

Next, go to the SM304000 (WebHooks) page.
In the WebHook Name field, enter a name. In our case, I named it TestHook.
In the Implementation Class selector select your class. Here, you can see it is called WebHooksConfiguration.TestWebHooks. Once again, note that the access modifier for the class must be Public.
Now, click Save. Acumatica will generate the URL for you to access.

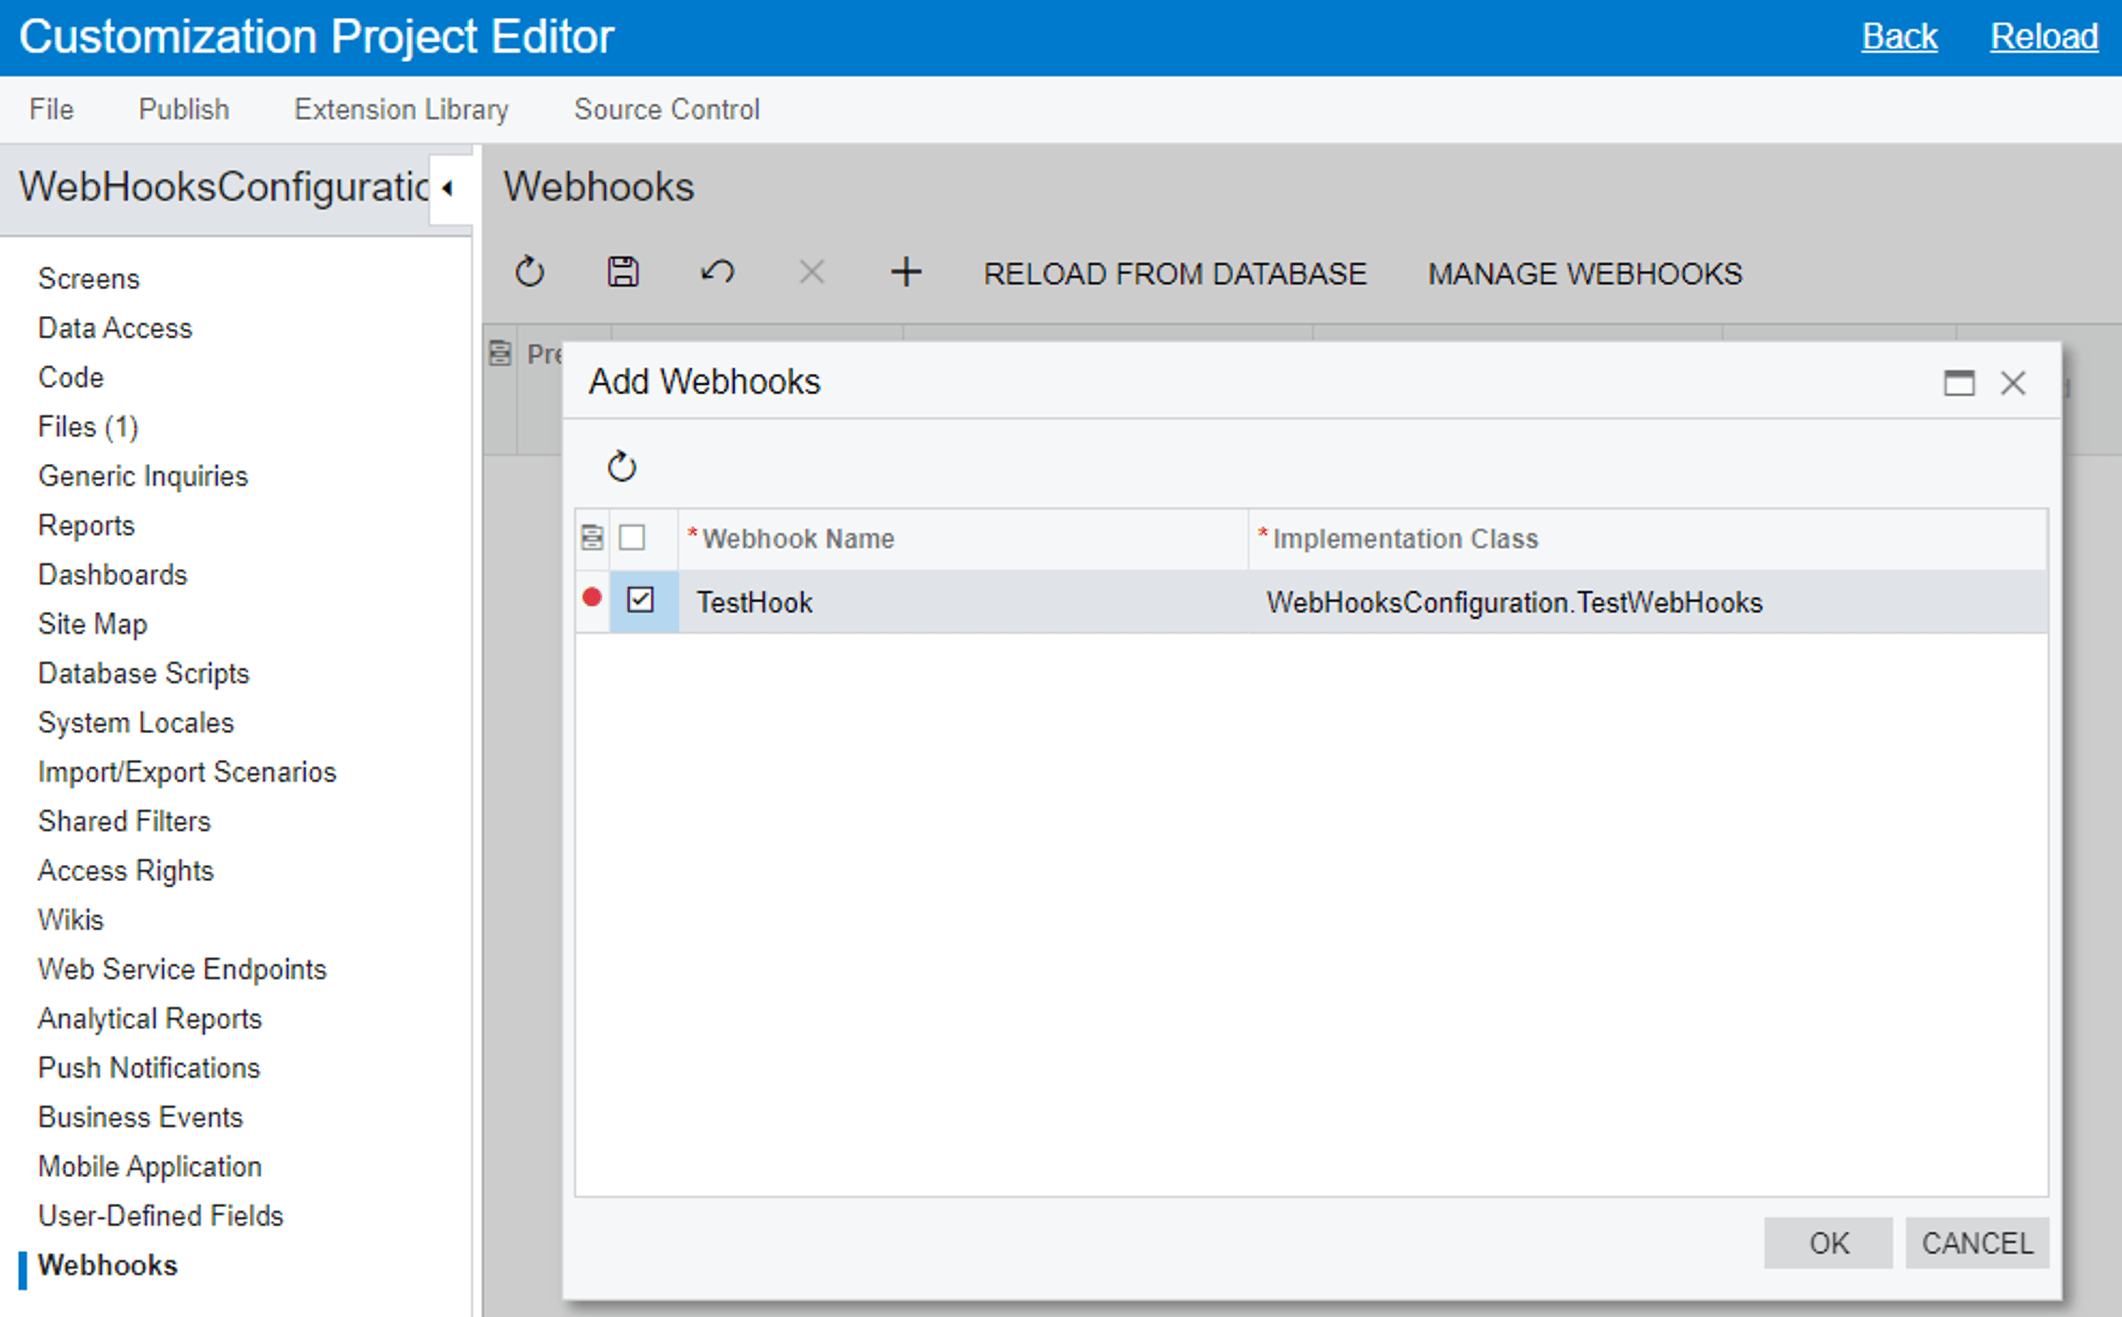
Go to customization -> Webhooks -> Add New record and select your newly created WebHook. Check the Predefined checkbox and click Publish Current Project.

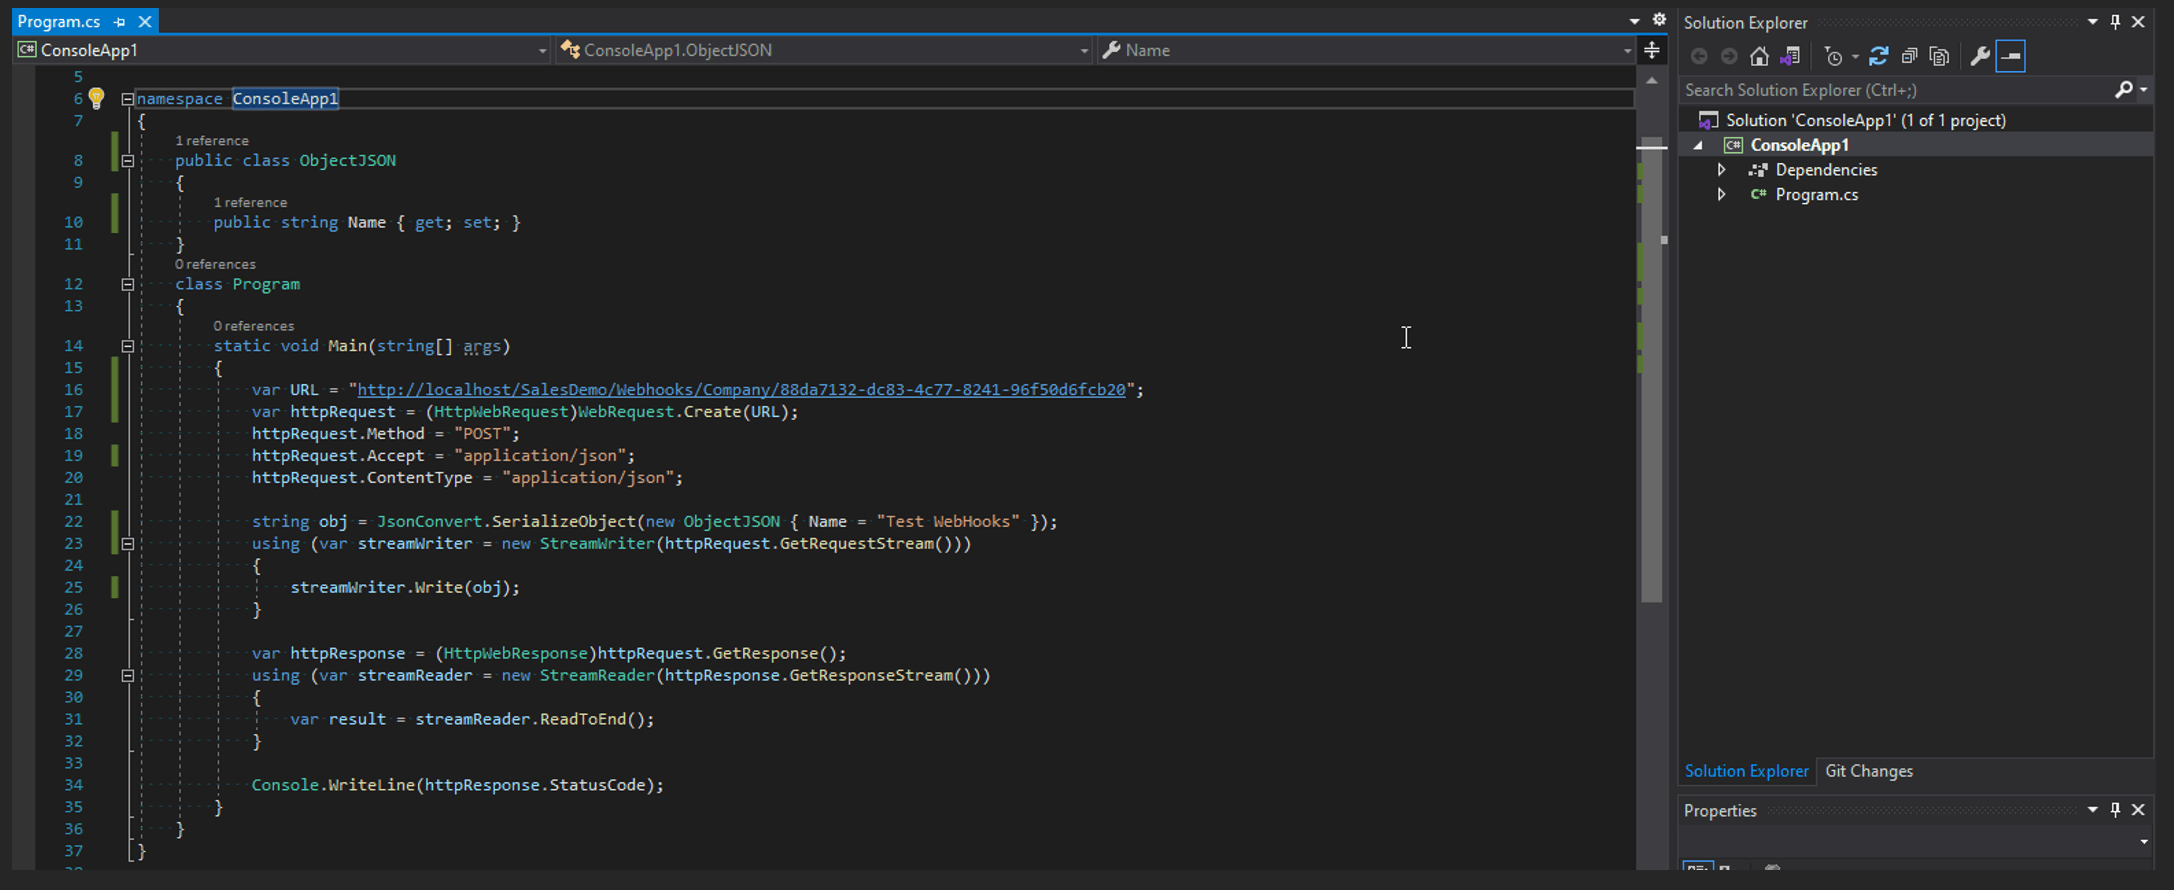
For testing, create a new console application and create the same ObjectJSON class to serialize the object which will be passed to Acumatica. Then note the URL generated by Acumatica.

Again, for your convenience, I placed the code for you in the following GIST:
GIST: https://gist.github.com/yuriycto/b1f42b4a116f106aa2e073f2a55e9793
Now at this point, we’ll put a breakpoint in our project “WebHooksConfiguration -> debug -> attach to process and run ConsoleApp1.


In the console application, you should get an OK response.

And that’s it. Simple as can be… as long as you follow the steps I outlined above. I hope this post is clear and makes it just a little bit easier for you to post requests in Acumatica using WebHooks.
Happy Coding!
 Canada (English)
 Colombia
 Caribbean and Puerto Rico
 Ecuador
 India
India
 Indonesia
 Ireland
 Malaysia
 Mexico
 Panama
 Peru
Peru
 Philippines
 Singapore
 South Africa
 Sri Lanka
 Thailand
 United Kingdom
 United States


